Using a Camera
This guide describes how to connect a camera to Embedded Artists RZ/G3E based Developer's Kits. Two different interfaces are described: MIPI/CSI-2 and USB.
USB interface
Camera
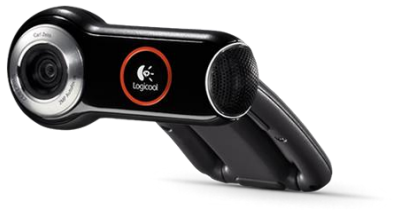
A Logitech QuickCam Pro 9000 camera was used when testing a camera via the USB interface.
Supported boards
All RZ/G3E boards support USB based cameras.
Instructions
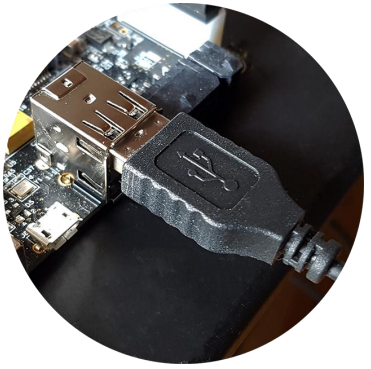
- Connect the camera to one of the USB host ports on the carrier board as shown in the figure below
- The camera will be detected and you will see output in the console similar to below.
usb 1-1.2: new high-speed USB device number 6 using xhci-renesas-hcd
usb 1-1.2: Found UVC 1.00 device <unnamed> (046d:0990)
input: UVC Camera (046d:0990) as /devices/platform/soc/15850000.usb/usb1/1-1/1-1.2/1-1.2:1.0/input/input9
uvcvideo 1-1.2:1.0: assigned reserved memory node linux,cma@58000000
- Use
v4l2-ctlto find out on which video interface the camera is attached. In this example only one interface is available and the USB camera (UVC Camera) is attached to/dev/video0.
v4l2-ctl --list-devices
UVC Camera (046d:0990) (usb-15850000.usb-1.2):
      /dev/video0
      /dev/video1
      /dev/media0
- Use the command below to start capturing a video stream and show it on a display. If you don’t have a display, go to step 5 and take a snapshot instead.
gst-launch-1.0 -v v4l2src device=/dev/video0 ! capsfilter caps="video/x-raw, width=640, height=480, framerate=30/1" ! queue ! autovideosink
- Use the command below to take a snapshot from the camera. The snapshot is stored as a jpeg file.
gst-launch-1.0 v4l2src device="/dev/video0" num-buffers=1 ! capsfilter caps="video/x-raw, width=640, height=480, framerate=30/1" ! videoconvert ! jpegenc ! filesink location=snapshot.jpeg
- In the above examples a resolution of 640x480 and frame rate of 30 fps was used. You can query the camera to see which resolutions and frame rates it supports for different pixel formats. Only a portion of the output from the command is shown below.
v4l2-ctl --list-formats-ext -d /dev/video0
ioctl: VIDIOC_ENUM_FMT
        Type        : Video Capture
        [0]: 'MJPG' (Motion-JPEG, compressed)
              Size: Discrete 160x120
                      Interval: Discrete 0.033s (30.000 fps)
                      Interval: Discrete 0.040s (25.000 fps)
                      Interval: Discrete 0.050s (20.000 fps)
                      Interval: Discrete 0.067s (15.000 fps)
                      Interval: Discrete 0.100s (10.000 fps)
  		...
              Size: Discrete 640x480
                      Interval: Discrete 0.033s (30.000 fps)
                      Interval: Discrete 0.040s (25.000 fps)
                      Interval: Discrete 0.050s (20.000 fps)
                      Interval: Discrete 0.067s (15.000 fps)
                      Interval: Discrete 0.100s (10.000 fps)
                      Interval: Discrete 0.200s (5.000 fps)
                      Interval: Discrete 0.200s (5.000 fps)
             Size: Discrete 800x600
  	        ...
         [1]: 'YUYV' (YUYV 4:2:2)
              Size: Discrete 160x120
                      Interval: Discrete 0.033s (30.000 fps)
                      Interval: Discrete 0.040s (25.000 fps)
  		...
MIPI/CSI-2 interface - Shikino KBCR-S08MM
Camera
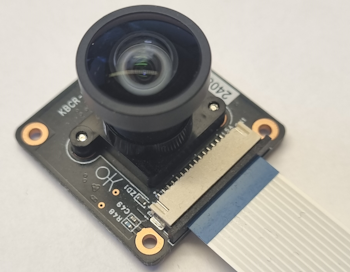
The KBCR-S08MM camera from KBCR-S08MM was used when testing a camera with MIPI interface. The driver for this camera is ox01f10.c so the camera is also referred to as ox01f10 in the documentation. Two data lanes are connected. The camera comes with a (about) 200 mm long, 20-pos, 1 mm pitch flat cable.
Do not extend the cable length more than this. The total length of the MIPI/CSI-2 trace length should be kept less than 200 mm. This is due to the high frequency signals on the MIPI/CSI2 interface.
Supported boards
All RZ/G3E boards support the MIPI/CSI-2 interface.
Instructions
- Connect camera to the carrier board.
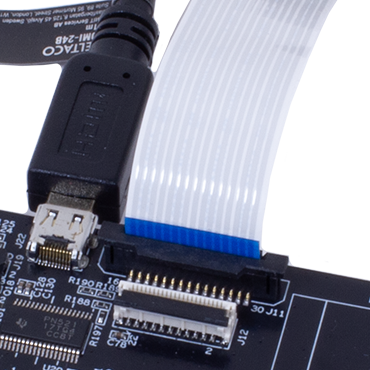
For the SOM Carrier Board, connect the camera to the J11 connector. This connector is located to the right of the micro-HDMI connector as shown in the photo below.
- Boot into the U-Boot. We need to make sure that the dtb (device tree) file has support for the ox01f10 before booting into Linux.
As the ox01f10 is the default mipi camera, all dtb files except for
rzg3e-ea-som-hdmi-ov5640.dtbhas support for it. For example, to use HDMI and the ox01f10 camera:
setenv fdt_file boot/rzg3e-ea-som-hdmi.dtb
saveenv
or to use LVDS and the ox01f10 camera:
setenv fdt_file boot/rzg3e-ea-som-lvds0.dtb
saveenv
If you want to see how the device file looks like you can find it on our GitHub repository.
- Reset the board and boot into Linux. When you have logged into Linux run the command below to see if the camera has been found. You should see the message
OX01F10 camera driver probed.
dmesg | grep ox01
ox01f10 8-0036: OX01F10 camera driver probed
- Use
v4l2-ctlto list available video interfaces. In this example three interfaces are listed, but no detailed information about each interface. The camera is in this case available on/dev/video0.
v4l2-ctl --list-devices
RZG2L_CRU (platform:16000000.video):
          /dev/video0
          /dev/media0
- Before capturing video or taking a snapshot you have to configure the camera with the wanted resolution and format.
For 1344x1020:
media-ctl -d /dev/media0 -r
media-ctl -d /dev/media0 -l "'csi-16000400.csi2':1 -> 'cru-ip-16000000.video':0 [1]"
media-ctl -d /dev/media0 -V "'csi-16000400.csi2':1 [fmt:UYVY8_1X16/1344x1020 field:none]"
media-ctl -d /dev/media0 -V "'ox01f10 8-0036':0 [fmt:UYVY8_1X16/1344x1020 field:none]"
media-ctl -d /dev/media0 -V "'cru-ip-16000000.video':0 [fmt:UYVY8_1X16/1344x1020 field:none]"
For 1280x960:
media-ctl -d /dev/media0 -r
media-ctl -d /dev/media0 -l "'csi-16000400.csi2':1 -> 'cru-ip-16000000.video':0 [1]"
media-ctl -d /dev/media0 -V "'csi-16000400.csi2':1 [fmt:UYVY8_1X16/1280x960 field:none]"
media-ctl -d /dev/media0 -V "'ox01f10 8-0036':0 [fmt:UYVY8_1X16/1280x960 field:none]"
media-ctl -d /dev/media0 -V "'cru-ip-16000000.video':0 [fmt:UYVY8_1X16/1280x960 field:none]"
For 1280x720:
media-ctl -d /dev/media0 -r
media-ctl -d /dev/media0 -l "'csi-16000400.csi2':1 -> 'cru-ip-16000000.video':0 [1]"
media-ctl -d /dev/media0 -V "'csi-16000400.csi2':1 [fmt:UYVY8_1X16/1280x720 field:none]"
media-ctl -d /dev/media0 -V "'ox01f10 8-0036':0 [fmt:UYVY8_1X16/1280x720 field:none]"
media-ctl -d /dev/media0 -V "'cru-ip-16000000.video':0 [fmt:UYVY8_1X16/1280x720 field:none]"
- Use the command below to start capturing a video stream and show it on a display. If you don't have a display, go to step 7 and take a snapshot instead. Note that the resolution must match the one that was selected in the previous step. If you configured the camera for 1344x1020 above but want to capture a video in 1280x960, go back to the previous step and reconfigure the camera first.
For 1344x1020:
gst-launch-1.0 v4l2src device=/dev/video0 ! video/x-raw,format=UYVY,width=1344,height=1020 ! videoconvert ! waylandsink sync=false
For 1280x960:
gst-launch-1.0 v4l2src device=/dev/video0 ! video/x-raw,format=UYVY,width=1280,height=960 ! videoconvert ! waylandsink sync=false
For 1280x720:
gst-launch-1.0 v4l2src device=/dev/video0 ! video/x-raw,format=UYVY,width=1280,height=720 ! videoconvert ! waylandsink sync=false
- Use the command below to take a snapshot from the camera. The snapshot is stored as a jpeg file. Note that the resolution must match the one that was selected in the configure step above. If you configured the camera for 1280x960 above but want to take a snapshot in 1344x1020, go back up and reconfigure the camera first.
For 1344x1020:
gst-launch-1.0 v4l2src device=/dev/video0 num-buffers=1 ! capsfilter caps="video/x-raw,format=UYVY,width=1344,height=1020,framerate=30/1" ! videoconvert ! jpegenc ! filesink location=snapshot.jpeg
For 1280x960:
gst-launch-1.0 v4l2src device=/dev/video0 num-buffers=1 ! capsfilter caps="video/x-raw,format=UYVY,width=1280,height=960,framerate=30/1" ! videoconvert ! jpegenc ! filesink location=snapshot.jpeg
For 1280x720:
gst-launch-1.0 v4l2src device=/dev/video0 num-buffers=1 ! capsfilter caps="video/x-raw,format=UYVY,width=1280,height=720,framerate=30/1" ! videoconvert ! jpegenc ! filesink location=snapshot.jpeg
MIPI/CSI-2 interface - Pcam5C/ov5640
Camera
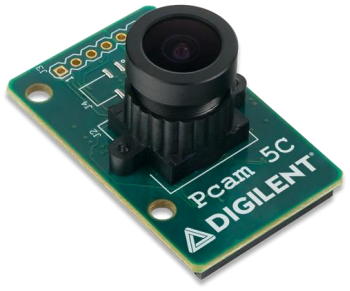
The Pcam 5C camera from Digilent was used when testing a camera with MIPI interface. This camera is using the Omnivision OV5640 image sensor. Two data lanes are connected. The camera comes with a (about) 200 mm long, 20-pos, 1 mm pitch flat cable.
Do not extend the cable length more than this. The total length of the MIPI/CSI-2 trace length should be kept less than 200 mm. This is due to the high frequency signals on the MIPI/CSI2 interface.
Supported boards
All RZ/G3E boards support the MIPI/CSI-2 interface.
Instructions
- Connect camera to the carrier board.
For the SOM Carrier Board, connect the camera to the J11 connector. This connector is located to the right of the micro-HDMI connector as shown in the photo below.
- Boot into the U-Boot. We need to change to a different dtb (device tree) file before booting into Linux. This new dtb file enables the MIPI/CSI-2 interface and adds the ov5640 camera to the I2C bus.
setenv fdt_file boot/rzg3e-ea-som-hdmi-ov5640.dtb
saveenv
If you want to see how the device file looks like you can find it on our GitHub repository.
- Reset the board and boot into Linux. When you have logged into Linux run the command below to see if the camera has been found. You should see the message
Consider updating driver ov5640 to match on endpoints.
dmesg | grep ov5640
ov5640 8-003c: Consider updating driver ov5640 to match on endpoints
- Use
v4l2-ctlto list available video interfaces. In this example three interfaces are listed, but no detailed information about each interface. The camera is in this case available on/dev/video0.
v4l2-ctl --list-devices
RZG2L_CRU (platform:16000000.video):
          /dev/video0
          /dev/media0
- Before capturing video or taking a snapshot you have to configure the camera with the wanted resolution and format.
For 720p:
media-ctl -d /dev/media0 -r
media-ctl -d /dev/media0 -l "'csi-16000400.csi2':1 -> 'cru-ip-16000000.video':0 [1]"
media-ctl -d /dev/media0 -V "'csi-16000400.csi2':1 [fmt:UYVY8_1X16/1280x720 field:none]"
media-ctl -d /dev/media0 -V "'ov5640 8-003c':0 [fmt:UYVY8_1X16/1280x720 field:none]"
media-ctl -d /dev/media0 -V "'cru-ip-16000000.video':0 [fmt:UYVY8_1X16/1280x720 field:none]"
For 1080p:
media-ctl -d /dev/media0 -r
media-ctl -d /dev/media0 -l "'csi-16000400.csi2':1 -> 'cru-ip-16000000.video':0 [1]"
media-ctl -d /dev/media0 -V "'csi-16000400.csi2':1 [fmt:UYVY8_1X16/1920x1080 field:none]"
media-ctl -d /dev/media0 -V "'ov5640 8-003c':0 [fmt:UYVY8_1X16/1920x1080 field:none]"
media-ctl -d /dev/media0 -V "'cru-ip-16000000.video':0 [fmt:UYVY8_1X16/1920x1080 field:none]"
- Use the command below to start capturing a video stream and show it on a display. If you don't have a display, go to step 7 and take a snapshot instead. Note that the resolution must match the one that was selected in the previous step. If you configured the camera for 720p above but want to capture a video in 1080p, go back to the previous step and reconfigure the camera first.
For 720p:
gst-launch-1.0 v4l2src device=/dev/video0 ! video/x-raw,format=UYVY,width=1280,height=720 ! videoconvert ! waylandsink sync=false
For 1080p:
gst-launch-1.0 v4l2src device=/dev/video0 ! video/x-raw,format=UYVY,width=1920,height=1080 ! videoconvert ! waylandsink sync=false
- Use the command below to take a snapshot from the camera. The snapshot is stored as a jpeg file. Note that the resolution must match the one that was selected in the configure step above. If you configured the camera for 720p above but want to take a snapshot in 1080p, go back up and reconfigure the camera first.
For 720p:
gst-launch-1.0 v4l2src device="/dev/video0" num-buffers=1 ! capsfilter caps="video/x-raw, width=1280, height=720, framerate=30/1" ! videoconvert ! jpegenc ! filesink location=snapshot.jpeg
For 1080p:
gst-launch-1.0 v4l2src device="/dev/video0" num-buffers=1 ! capsfilter caps="video/x-raw, width=1920, height=1080, framerate=30/1" ! videoconvert ! jpegenc ! filesink location=snapshot.jpeg
Useful commands
gst-device-monitor-1.0
To figure out valid resolution+format combinations are valid for a camera you can use gst-device-monitor-1.0. Only a part of the output is shown here and it is for a usb web camera from ProXtend:
gst-device-monitor-1.0
Device found:

        name  : ProXtend: ProXtend
        class : Video/Source
        caps  : video/x-raw, format=YUY2, width=1920, height=1080, pixel-aspect-ratio=1/1, framerate=5/1
                video/x-raw, format=YUY2, width=1280, height=720, pixel-aspect-ratio=1/1, framerate={ (fraction)10/1, (fraction)15/2, (fraction)5/1 }
                video/x-raw, format=YUY2, width=1024, height=576, pixel-aspect-ratio=1/1, framerate={ (fraction)15/1, (fraction)10/1, (fraction)15/2, (fraction)5/1 }
                video/x-raw, format=YUY2, width=800, height=600, pixel-aspect-ratio=1/1, framerate={ (fraction)20/1, (fraction)15/1, (fraction)10/1, (fraction)15/2, (fraction)5/1 }
                video/x-raw, format=YUY2, width=640, height=480, pixel-aspect-ratio=1/1, framerate={ (fraction)30/1, (fraction)25/1, (fraction)20/1, (fraction)15/1, (fraction)10/1, (fraction)15/2, (fraction)5/1 }
                video/x-raw, format=YUY2, width=320, height=240, pixel-aspect-ratio=1/1, framerate={ (fraction)30/1, (fraction)25/1, (fraction)20/1, (fraction)15/1, (fraction)10/1, (fraction)15/2, (fraction)5/1 }
                image/jpeg, parsed=true, width=1920, height=1080, pixel-aspect-ratio=1/1, framerate={ (fraction)30/1, (fraction)25/1, (fraction)20/1, (fraction)15/1, (fraction)10/1, (fraction)15/2, (fraction)5/1 }
                image/jpeg, parsed=true, width=1280, height=720, pixel-aspect-ratio=1/1, framerate={ (fraction)30/1, (fraction)25/1, (fraction)20/1, (fraction)15/1, (fraction)10/1, (fraction)15/2, (fraction)5/1 }
                image/jpeg, parsed=true, width=1024, height=576, pixel-aspect-ratio=1/1, framerate=30/1
                image/jpeg, parsed=true, width=800, height=600, pixel-aspect-ratio=1/1, framerate={ (fraction)30/1, (fraction)25/1, (fraction)20/1, (fraction)15/1, (fraction)10/1, (fraction)15/2, (fraction)5/1 }
                image/jpeg, parsed=true, width=640, height=480, pixel-aspect-ratio=1/1, framerate={ (fraction)30/1, (fraction)25/1, (fraction)20/1, (fraction)15/1, (fraction)10/1, (fraction)15/2, (fraction)5/1 }
                image/jpeg, parsed=true, width=320, height=240, pixel-aspect-ratio=1/1, framerate={ (fraction)30/1, (fraction)25/1, (fraction)20/1, (fraction)15/1, (fraction)10/1, (fraction)15/2, (fraction)5/1 }
        properties:
                udev-probed = true
                device.bus_path = platform-15850000.usb-usb-0:1.2:1.0
                sysfs.path = /sys/devices/platform/soc/15850000.usb/usb3/3-1/3-1.2/3-1.2:1.0/video4linux/video1
                device.bus = usb
                device.subsystem = video4linux
                device.vendor.id = 1bcf
                device.vendor.name = SunplusIT\x20Inc
                device.product.id = 2283
                device.product.name = ProXtend: ProXtend
                device.serial = SunplusIT_Inc_ProXtend_20201130V0
                device.capabilities = :capture:
                device.api = v4l2
                device.path = /dev/video1
                v4l2.device.driver = uvcvideo
                v4l2.device.card = ProXtend: ProXtend
                v4l2.device.bus_info = usb-15850000.usb-1.2
                v4l2.device.version = 393579 (0x0006016b)
                v4l2.device.capabilities = 2225078273 (0x84a00001)
                v4l2.device.device_caps = 69206017 (0x04200001)
        gst-launch-1.0 v4l2src device=/dev/video1 ! ...
v4l2-ctl
To list information using v4l2-ctl for a specific device, e.g. /dev/video0:
v4l2-ctl -V -d /dev/video0 --list-formats-ext
Format Video Capture:
        Width/Height      : 1920/1080
        Pixel Format      : 'YUYV' (YUYV 4:2:2)
        Field             : None
        Bytes per Line    : 3840
        Size Image        : 4147200
        Colorspace        : sRGB
        Transfer Function : sRGB
        YCbCr/HSV Encoding: ITU-R 601
        Quantization      : Full Range
        Flags             :
ioctl: VIDIOC_ENUM_FMT
        Type: Video Capture

        [0]: 'UYVY' (UYVY 4:2:2)
        [1]: 'NV16' (Y/UV 4:2:2)
        [2]: 'UYVY' (UYVY 4:2:2)
        [3]: 'YUYV' (YUYV 4:2:2)
        [4]: 'GREY' (8-bit Greyscale)
        [5]: 'BGR3' (24-bit BGR 8-8-8)
        [6]: 'XR24' (32-bit BGRX 8-8-8-8)
        [7]: 'AR24' (32-bit BGRA 8-8-8-8)
        [8]: 'BA24' (32-bit ARGB 8-8-8-8)
        [9]: 'BA81' (8-bit Bayer BGBG/GRGR)
        [10]: 'GBRG' (8-bit Bayer GBGB/RGRG)
        [11]: 'GRBG' (8-bit Bayer GRGR/BGBG)
        [12]: 'RGGB' (8-bit Bayer RGRG/GBGB)
        [13]: 'RG10' (10-bit Bayer RGRG/GBGB)
        [14]: 'BA10' (10-bit Bayer GRGR/BGBG)
        [15]: 'GB10' (10-bit Bayer GBGB/RGRG)
        [16]: 'BG10' (10-bit Bayer BGBG/GRGR)
        [17]: 'RG12' (12-bit Bayer RGRG/GBGB)
        [18]: 'BA12' (12-bit Bayer GRGR/BGBG)
        [19]: 'GB12' (12-bit Bayer GBGB/RGRG)
        [20]: 'BG12' (12-bit Bayer BGBG/GRGR)
        [21]: 'pREE' (14-bit Bayer RGRG/GBGB Packed)
        [22]: 'pgEE' (14-bit Bayer GRGR/BGBG Packed)
        [23]: 'pGEE' (14-bit Bayer GBGB/RGRG Packed)
        [24]: 'pBEE' (14-bit Bayer BGBG/GRGR Packed)
        [25]: 'RG16' (16-bit Bayer RGRG/GBGB)
        [26]: 'GR16' (16-bit Bayer GRGR/BGBG)
        [27]: 'GB16' (16-bit Bayer GBGB/RGRG)
        [28]: 'BYR2' (16-bit Bayer BGBG/GRGR)
GST_DEBUG=3
Not a command but rather a way to troubleshoot a gstreamer command. Prefix your command with GST_DEBUG=3. The higher the number the more verbose the output gets. So instead of calling:
gst-launch-1.0 v4l2src device=/dev/video0 ! video/x-raw,width=1920,height=1080,format=YUY2 ! waylandsink
use
GST_DEBUG=3 gst-launch-1.0 v4l2src device=/dev/video0 ! video/x-raw,width=1920,height=1080,format=YUY2 ! waylandsink
meda-ctl
To see the pipeline set up when using a mipi camera:
media-ctl -p
Media controller API version 6.1.107

Media device information
------------------------
driver          rzg2l_cru
model           renesas,rzg3e-cru
serial
bus info        platform:16000000.video
hw revision     0x0
driver version  6.1.107

Device topology
- entity 1: csi-16000400.csi2 (2 pads, 2 links, 0 routes)
            type V4L2 subdev subtype Unknown flags 0
            device node name /dev/v4l-subdev0
        pad0: Sink
                [stream:0 fmt:UYVY8_1X16/1280x720 field:none colorspace:srgb xfer:srgb ycbcr:601 quantization:full-range]
                <- "ov5640 8-003c":0 [ENABLED,IMMUTABLE]
        pad1: Source
                [stream:0 fmt:UYVY8_1X16/1280x720 field:none colorspace:srgb xfer:srgb ycbcr:601 quantization:full-range]
                -> "cru-ip-16000000.video":0 [ENABLED,IMMUTABLE]

- entity 4: ov5640 8-003c (1 pad, 1 link, 0 routes)
            type V4L2 subdev subtype Sensor flags 0
            device node name /dev/v4l-subdev1
        pad0: Source
                [stream:0 fmt:UYVY8_1X16/1280x720@1/30 field:none colorspace:srgb xfer:srgb ycbcr:601 quantization:full-range
                 crop.bounds:(0,0)/2624x1964
                 crop:(0,250)/2624x1456]
                -> "csi-16000400.csi2":0 [ENABLED,IMMUTABLE]

- entity 8: cru-ip-16000000.video (2 pads, 2 links, 0 routes)
            type V4L2 subdev subtype Unknown flags 0
            device node name /dev/v4l-subdev2
        pad0: Sink
                [stream:0 fmt:UYVY8_1X16/1280x720 field:none]
                <- "csi-16000400.csi2":1 [ENABLED,IMMUTABLE]
        pad1: Source
                [stream:0 fmt:UYVY8_1X16/1280x720 field:none]
                -> "CRU output":0 [ENABLED,IMMUTABLE]

- entity 17: CRU output (1 pad, 1 link)
             type Node subtype V4L flags 0
             device node name /dev/video0
        pad0: Sink
                <- "cru-ip-16000000.video":1 [ENABLED,IMMUTABLE]
It shows that the pipe is
entity 4 -> entity 1 -> entity 8 -> entity 17
or
ov5640 8-003c -> csi-16000400.csi2 -> cru-ip-16000000.video -> CRU output