Updating Files on Target
There are four parts that make up a running system: U-Boot, Linux kernel, device tree files and a root file system. The U-Boot and root file system must be flashed as described in Deploy Images (uSD) or Deploy Images (eMMC). The Linux kernel and the device tree files are however much easier to update, and this appendix will show a couple of different ways to do this.
- Secure Copy From Target - Requires network but no extra software
- Secure Copy To Target - Requires network and PC software. Target must be modified to allow incoming connection. The advantage is an application with a GUI.
- USB memory stick - Only requires a Memory Stick but using it involves a lot of plugging/copying/unplugging
Note that the sections below focus on updating the Linux kernel and device tree files, but the same commands can be used to update any file on the target.
Secure Copy from Target
The default file system on all RZ/G3E Developer's Kits come with the scp tool preinstalled. If the target is connected to the same network as you build computer and the build computer has an ssh server running then scp can be used to transfer files from the build server.
On target:
ls /boot/
Image
Image-6.1.107-cip28-yocto-standard
rzg3e-ea-som-hdmi.dtb
rzg3e-ea-som-lcd.dtb
rzg3e-ea-som-lvds0.dtb
rzg3e-ea-som-lvds1.dtb
The scp command looks like this:
scp <username>@<server>:<path> <destination>
To copy the kernel from server with IP address 192.168.0.10 as user bob it could look like this:
scp bob@192.168.0.10:/home/bob/linux-rz/arch/arm64/boot/Image /boot/
Secure Copy To Target - WinSCP
WinSCP is a Windows program that is very useful to transfer files from the PC to the target hardware. It can also be used to transfer the files from a yocto build to the PC where the files can be flashed as described in Deploy Images (uSD) or Deploy Images (eMMC).
Download and Install
Download the program from https://winscp.net/eng/download.php and install it.
Connect to Target
When WinSCP is started it asks for connection information. Enter the following information
| Field | Value |
|---|---|
| User name | root |
| Password | leave the field empty |
| Host name | The IP number of the target (found by running ifconfig on the target) |
| File protocol | SCP or SFTP |
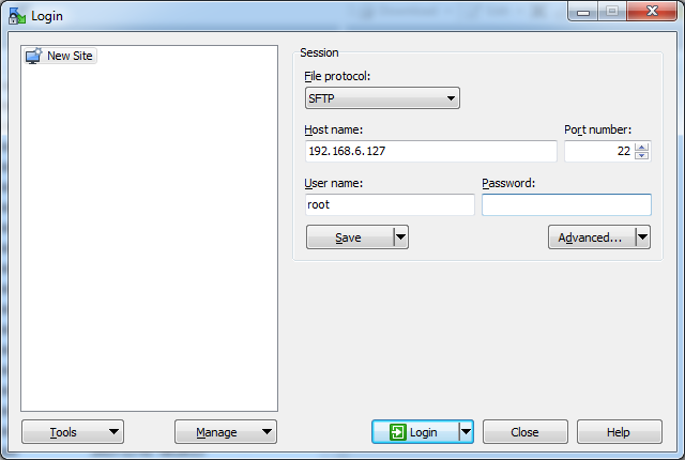
Press the Login button to connect to the target.
The first time connecting to the target (or after a re-flash of the target) this dialog will appear:
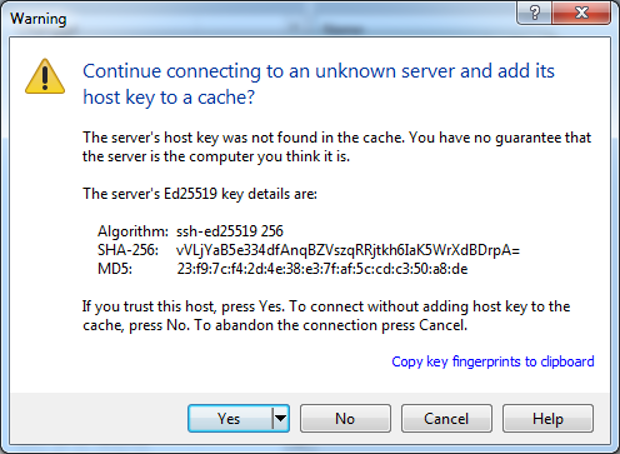
Press the Yes button to accept it.
Copy Files
This is what the program looks like after a successful login:
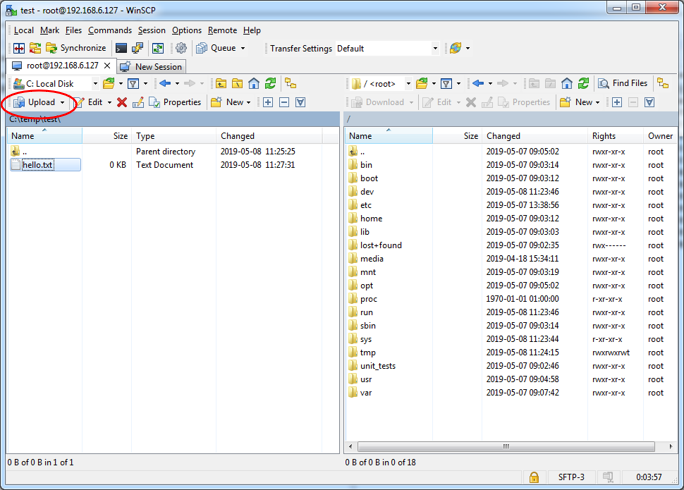
Select a file on the left side (the PC), select a destination folder on the target (right side) and then click the Upload button to transfer the file.
USB Memory Stick
If the build machine is not accessible over network, then copying the files on the build server onto a USB Memory Stick could be an option.
When the USB Memory Stick is inserted on the target some status messages will be printed in the console.
usb 2-1: new high-speed USB device number 2 using ehci-platform
usb-storage 2-1:1.0: USB Mass Storage device detected
scsi host0: usb-storage 2-1:1.0
scsi 0:0:0:0: Direct-Access     USB      Flash Disk       1100 PQ: 0 ANSI: 0 CCS
sd 0:0:0:0: [sda] 3915776 512-byte logical blocks: (2.00 GB/1.87 GiB)
sd 0:0:0:0: [sda] Write Protect is off
sd 0:0:0:0: [sda] No Caching mode page found
sd 0:0:0:0: [sda] Assuming drive cache: write through
   sda: sda1
sd 0:0:0:0: [sda] Attached SCSI disk
The interesting part above is the sda: sda1 which indicates which device (sda1) that the USB memory stick is assigned to.
To be able to access the memory stick it must first be mounted:
mkdir /mnt/usb
mount /dev/sda1 /mnt/usb
The memory stick is now available in the /mnt/usb directory on the file system:
ls /mnt/usb/
hello.txt
cp /mnt/usb/hello.txt /root/
Before physically removing the memory stick from the SOM Carrier Board, it should be unmounted to make sure that all pending write operations are committed to prevent data loss:
umount /mnt/usb