iMX SOM Developer's Kit
Kit overview

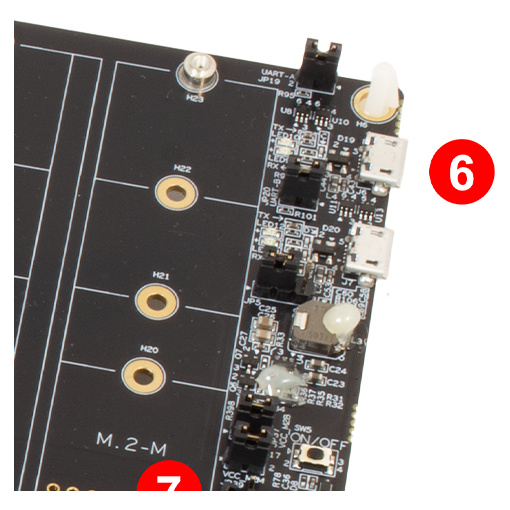
The photo above provides an overview of an iMX SOM Developer's Kit. The highlighted parts are described below.
- Power supply
- Power on/off switch
- USB C connected to USB OTG (for programming the board)
- Network cable connected to RJ45 connector
- micro-HDMI for display
- micro-B USB cable for console
- ISP enable jumper (OTG boot mode)
- Reset button
The default position of all jumpers and slider switches are shown in this document.
Console
Connect the micro-B end of the USB cable to the console connector (6 in the overview figure) on the SOM Carrier board and the other end of the cable to your PC acting as host computer.
A COM port will be automatically configured. If the port is not configured you may need to install FTDI drivers.
You will also need a terminal application. We recommend Tera Term, but you can use the terminal application of your choice. Connect to the virtual COM port using 115200 as baud rate, 8 data bits, 1 stop bit, and no parity.
Power supply
Together with the kit you get a 12V power supply with AC plugs for EU, UK, and US.
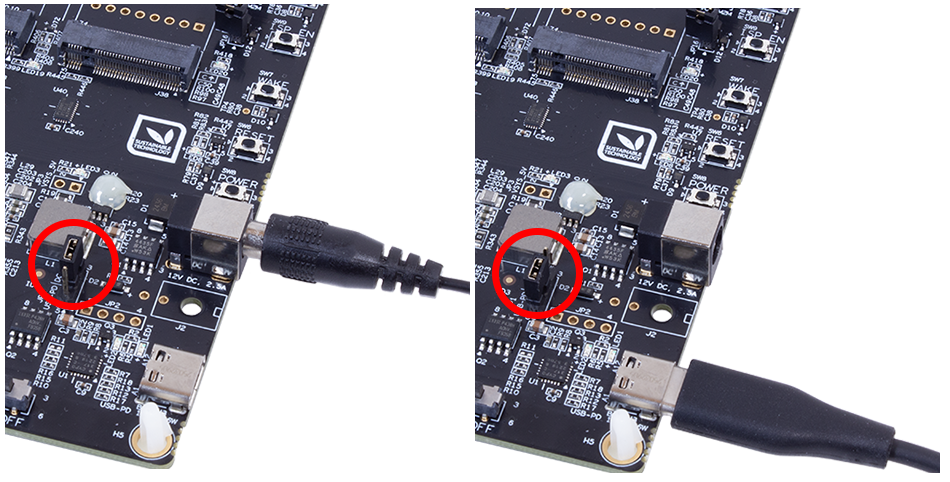
Select the plug used in your country and attach it to the power supply. Connect the 2.1mm male barrel jack to the SOM Carrier board (left figure below or 1 in the overview figure). Make sure the JP1 jumper is in the upper position as shown in the left figure below.
It is also possible to power the board using a USB C cable. Make sure the JP1 jumper is in the lower position as shown in the right figure below.
Set the Power on/off switch (2 in the overview figure) to On state and the board will now power up.
Login prompt
After the board has been powered the software will boot. You can observe the boot process in the terminal application.

When the boot process is complete you will be presented with a login prompt. Enter the login credentials below to log in.
- Username:
root - Password:
pass
What to do next
Now you are up-and-running with your SOM Developer’s Kit, but there is much more you can do. A lot of documentation and guides are available and a few of them are listed below.