Keil uVision / MDK
This section is a guide to open, build and debug an example application using Keil uVision/MDK. It is assumed that you have this development environment installed on your computer.
Install the SDK
Unpack the SDK zip file that was downloaded in the Download the SDK section somewhere on the local file system. It is suggested to use a very short path as the SDK has a deep folder structure and a too long path can cause problem in Windows.
The folder that the SDK is unpacked into will be referred to as <install_dir> in the following sections.
Install CMSIS Device Pack
After the MDK tools are installed, Cortex Microcontroller Software Interface Standard (CMSIS) device packs must be installed to fully support the device from a debug perspective. These packs include things such as memory map information, register definitions and flash programming algorithms.
In most cases, if you open one of the projects from the unpacked SDK in Keil uVision, it will detect if the CMSIS pack is needed and ask if it should be downloaded/installed. Accept it and let it be installed.
Note that this could take a long time (~20 minutes) but it is a onetime operation so don’t abort and let it complete.
In the rare cases where Keil uVision cannot detect the package automatically for you, follow these steps to install the CMSIS pack manually.
-
Start Keil uVision
-
Start the Pack Installer tool with this button on the toolbar.

-
Browse to the device tree to the left and locate the device (for example NXP → MIMXRT1176 → MIMXRT1176xxxxx or similar for other MCUs) and then locate the package in the right side with a
_DFPin the name and click the Install button next to it. Note that the button in the image below says Update and not Install as the package has already been installed.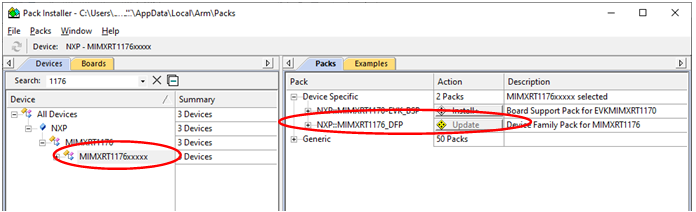
Build an Example Application
The following steps will guide you through opening the hello_world application for the Cortex-M7 core of the iMX RT1176. These steps may change slightly for other MCUs and other example applications as some of these applications may have additional layers of folders in their path. Note that the Keil uVision workspace files are always placed in subfolders named mdk/ so look for that.
- Open the desired example application either by double clicking the .uvmpw file in the explorer or by starting Keil uVision and selecting Project → Open Project... from the menu. The hello world example has this path:
<install_dir>boards/evkmimxrt1170/demo_apps/hello_world/cm7/mdk/hello_world_demo_cm7.uvmpw
-
Customize the project. For projects using a display this includes selecting which display to use, for networking projects it may include setting the IP number/netmask, for Wi-Fi projects it includes selecting which M.2 module to use and which Wi-Fi network to connect to.
These settings are handled differently for different SDK versions and different MCUs so consult the readme.txt file available in the
docs/folder of each example for information. -
Select the desired build target from the drop-down. For this example, select the debug target.
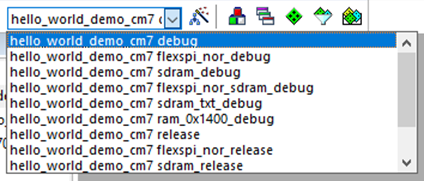
The target name indicates from where the application is executing, see table below. Release targets have a higher compiler optimization degree making the target less suitable for debugging. Available targets differ from example to example but here are some of the more common ones.
<project> sdram_debug<project> sdram_releaseThe application runs in internal SRAM but with data in external SDRAM <project> sdram_txt_debug<project> sdram_txt_releaseThe application runs in external SDRAM but with data in internal SRAM <project> debug<project> releaseThe application runs in internal SRAM <project> flexspi_nor_debug<project> flexspi_nor_releaseThe application runs in external flash, which must be programmed before use <project> flexspi_nor_sdram_debug<project> flexspi_nor_sdram_releaseThe application runs in external flash and use SDRAM. The external flash must be programmed before use. noteNote that each of the targets have its own set of options so changing for example include path in one target does not affect the other targets.
-
To build the demo project, select the Rebuild button, highlighted in red.

-
The build will complete without errors.

Run an Example Application
To download and run the application, perform these steps:
-
Prepare the hardware as described in the Preparing the hardware section and power it on.
-
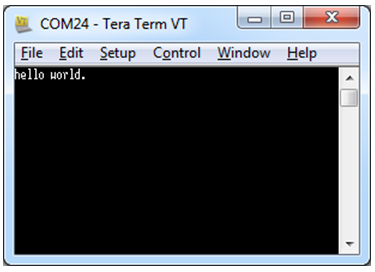
Open the terminal application on the PC, such as TeraTerm or PuTTY, and connect to the virtual COM port. Configure the terminal with 115200 baud, 8N1. You can alter the baud rate by searching for the
BOARD_DEBUG_UART_BAUDRATEdefine in file:board.h. -
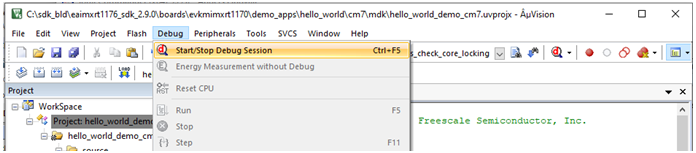
Select the Debug menu and then Start/Stop Debug Session, or simply press Ctrl+F5. The application will then be downloaded into SRAM.
-
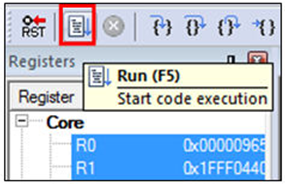
Run the code by clicking the Run button (or tress F5) to start the application.
-
The
hello_worldapplication is now running, and a banner is displayed on the terminal. If this is not true, check your terminal settings and connections.