NXP MCUXpresso IDE
This section is a guide to open, build and debug an example application using NXP MCUXpresso IDE. It is assumed that you have this development environment installed on your computer.
Install the SDK
MCUXpresso requires the SDK to be installed before it can be used. To do that start MCUXpresso and then drag-n-drop the SDK zip file that was downloaded in the Download the SDK section to the Installed SDKs tab in MCUXpresso:
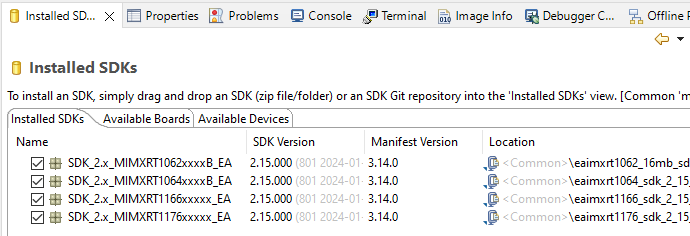
During the installation MCUXpresso will make a copy of the zip file that you drag-n-dropped so it is ok to delete it afterwards if you don't need it for one of the other IDEs.
Build an Example Application
The following steps will guide you through opening the hello_world application from the SDK.
-
Install the SDK as described above if you have not done so already
-
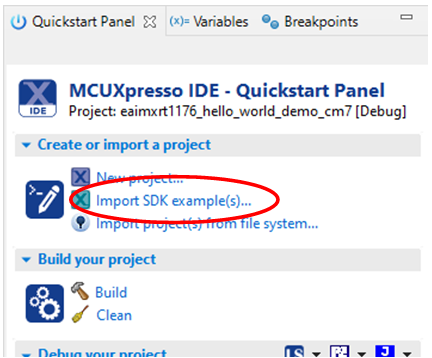
Click the Import SDK example(s)... link in the Quickstart Panel
-
Select the iMX RT Developer’s Kit (in this case the
eaimxrt1176). Click Next to go to the project selector.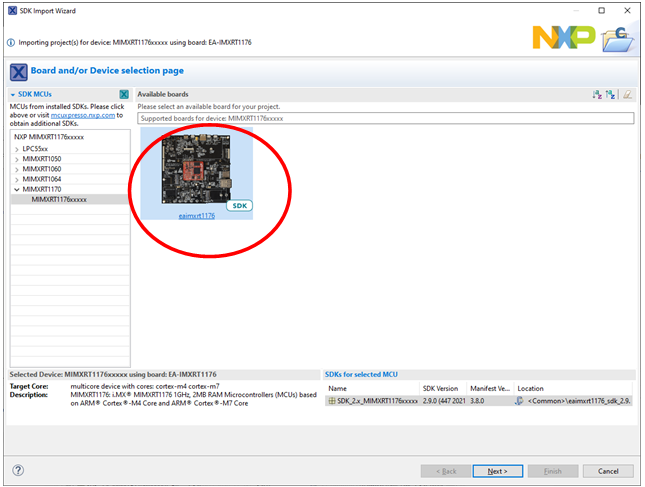
-
Select the
hello_worldexample for Cortex-M7 (ends in_cm7) and make sure to switch from Semihost to UART for the SDK Debug Console.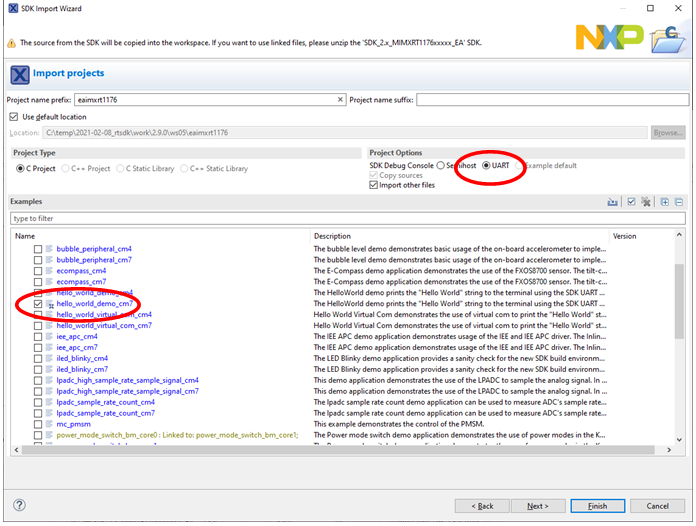
-
Click Finish to have MCUXpresso import and set up the selected project.
-
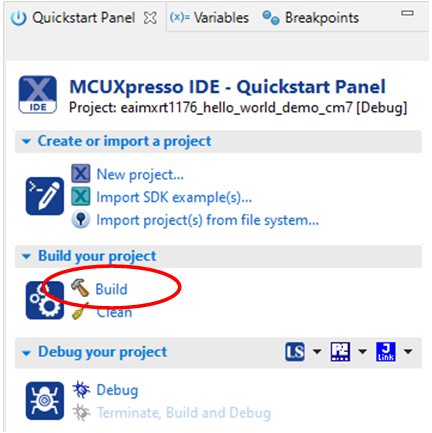
Click Build in the Quickstart Panel.
-
The build will complete without errors.
Run an Example Application
To download and run the application, perform these steps:
-
Prepare the hardware as described in the Preparing the hardware section and power it on.
-
Open the terminal application on the PC, such as TeraTerm or PuTTY, and connect to the virtual COM port. Configure the terminal with 115200 baud, 8N1. You can alter the baud rate by searching for the
BOARD_DEBUG_UART_BAUDRATEdefine in fil:board.h -
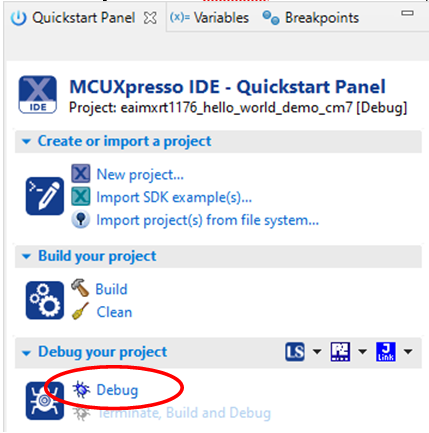
Click the Debug button in the Quickstart Panel to download the application to the target.
-
The application is then downloaded to the target and automatically runs to the
main()function. -
Run the code by clicking the Resume button to start the application.

-
The
hello_worldapplication is now running, and a banner is displayed on the terminal. If this is not true, check your terminal settings and connections.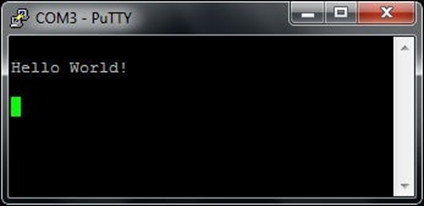
Target Memory
Almost all examples for MCUXpresso are setup to run from flash. If the flash is used, or not, can be seen when compiling.
To run the program in RAM/SDRAM (if it is small enough to fit).
-
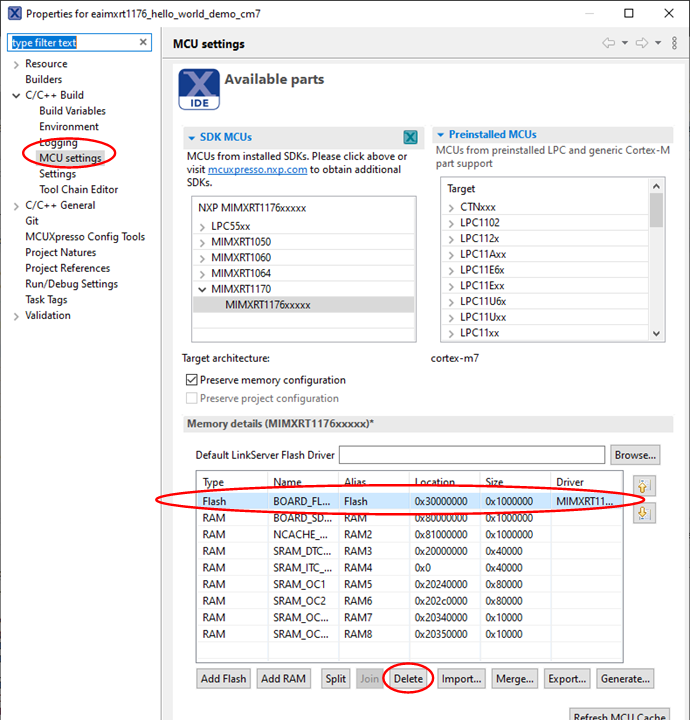
Open the Project → Properties menu and navigate to MCU Settings
-
Select the
BOARD_FLASHrow in the table and then click the Delete button to remove the flash. -
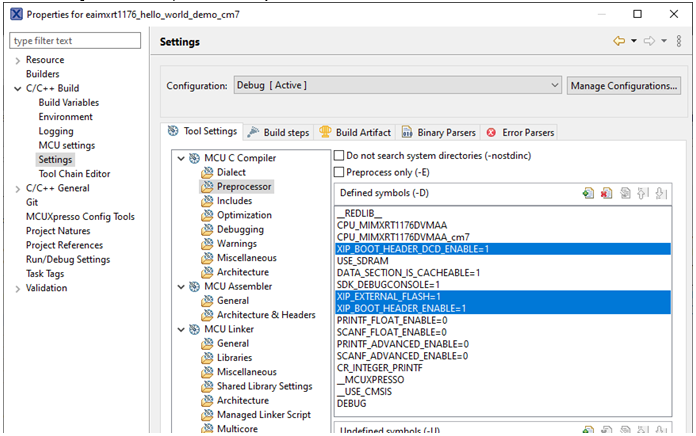
Go to Settings and the Preprocessor entry
-
There are three symbols that must be changed. The symbols are
XIP_BOOT_HEADER_DCD_ENABLE,XIP_EXTERNAL_FLASHandXIP_BOOT_HEADER_ENABLE. Double-click each one and change the value from1to0to disable the feature. -
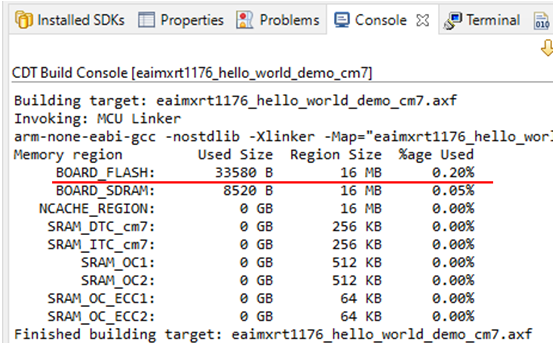
Build the project and look at the output. The
BOARD_FLASHis no longer present and instead theSDRAMis used.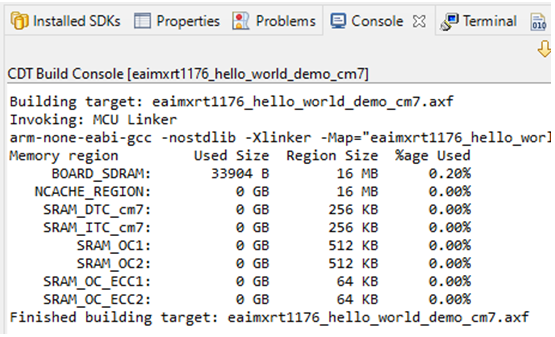
Troubleshooting
It is possible that a dialog like this pops up when building your project.
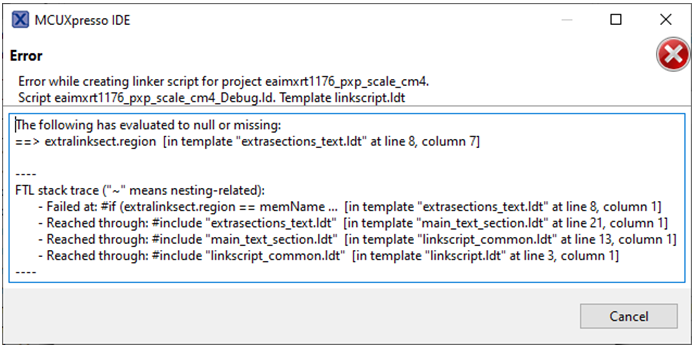
That error message appears because the project was not 100% imported and this happens sometimes if you select multiple projects to import at the same time. To fix the problem you have two choices:
- Option 1: Right click the project, select Delete and make sure that the checkbox for deleting the content on the disk is filled in. You can then import that project again.
- Option 2: Switch to a new workspace and only import that project.