Develop with Node.js
Introduction
Node.js is a Javascript runtime environment that has become quite popular when developing different kinds of applications, for example, web server applications. This guide shows you how to install Node.js on the target file system and how to get started with your development. If you need to learn how to develop with Node.js or Javascript there are many resources online. A few of these are listed below.
- https://nodejs.org/en/docs/
- https://www.tutorialspoint.com/nodejs/index.htm
- https://www.tutorialspoint.com/javascript/
Getting started
The instructions in this guide have been tested on a virtual machine running lubuntu 16.04.
If you are an experienced Linux user it shouldn’t be a problem using another Linux distribution with the instructions below as a guideline.
Add Node.js to Yocto image
The default Yocto images provided by Embedded Artists don’t contain Node.js support. This can be added by modifying the local.conf file in your build. These instructions will add Node.js version 6.9.2.
- Open
local.conf. Replace<build dir>with your build directory.nano <build dir>/conf/local.conf - Find the
IMAGE_INSTALL_appendvariable and add the lines below. The package callednodejs-npminstalls a package manager for Node.js. Using this package manager you can install additional packages/modules. The third line installs build tools (compiler, linker) on the target file system. This can be needed if a Node.js module must be built from source during installation (when using npm). The last line isn’t really related to Node.js. This line installs a SFTP server which can be useful when doing remote deployment.nodejs \
nodejs-npm \
packagegroup-core-buildessential \
openssh-sftp-server \ - There are two more lines to add to
local.conf. The first selects which version of Node.js to use. The second line was needed to solveopensslrelated build issues.PREFERRED_VERSION_nodejs ?= "6.9.2"
PACKAGECONFIG_append_pn-nodejs = " openssl" - Save the file and exit the editor: CTRL+X followed by Y and Enter.
- Now build your image.
- When the image has been built don’t forget to deploy the image on the target.
Node.js layers are only included in the 4.1.15 branch and were added to ea-yocto-base January 11, 2017. If you are using an older branch or revision you need to update.
Hello world
It is now time to create the first application and verify that Node.js is working. Please note that you must have deployed the new image on the target, booted into Linux, and having a console/terminal application connected to the target.
- Create an application file
nano hello.js - Add the line below to the file. This line prints "Hello world".
console.log('Hello world') - Save the file and exit: CTRL+X followed by Y and Enter.
- Start the application
node hello.jsHello world
Simple web server
It is common to use Node.js when developing web applications. This example shows how a really simple web server can be created.
- First get the IP address of the target since this is needed in a later step. In the example below the IP address is 192.168.1.130.
ifconfigeth0 Link encap:Ethernet HWaddr CA:71:64:BD:1A:20
inet addr:192.168.1.130 Bcast:192.168.1.255 Mask:255.255.255.0
inet6 addr: fe80: - Create the application file.
nano web.js - Add the code below to the file. This code is originally from https://nodejs.org/dist/latest-v6.x/docs/api/synopsis.html. Please note that you may need to change the IP address (hostname variable) to the IP address retrieved in step 1.
const http = require('http');
const hostname = '192.168.1.130';
const port = 3000;
const server = http.createServer((req, res) => {
  res.statusCode = 200;
  res.setHeader('Content-Type', 'text/plain');
  res.end('Hello World\n');
});
server.listen(port, hostname, () => {
  console.log(`Server running at http://${hostname}:${port}/`);
}); - Save the file and exit: CTRL+X followed by Y and Enter.
- Start the application.
node web.jsServer running at http://192.168.1.130:3000/ - Start a web browser and enter the address shown in the console. You should see the message "Hello World" in the web browser.
WebStorm
There are many different editors and development environments for Node.js. For minor applications a basic text editor, such as nano or vi (on Linux), can be used. For more complex applications a more complete development environment, supporting for example syntax highlighting, code completion, and debugging, is often preferred. In this section we are going to describe how to install and use WebStorm from JetBrains.
Install Node.js
Before installing WebStorm it is recommended to install Node.js on your development computer. A lot of the development can be done on the computer and then deployed to the target board. As previously mentioned lubuntu 16.04 is used as development computer when writing these instructions.
You can use the package manager to install Node.js. This will give you Node.js version 4.2.6.
sudo apt-get install nodejs
Since the target file system will have version 6.9.2 it is however recommended to use the same version on the development computer. It is possible to download and install this version directly from the Node.js website.
On this link you can find different versions: https://nodejs.org/en/download/releases/.
The instructions below download and unpacks version 6.9.2 for a 64-bit Linux computer.
wget https://nodejs.org/download/release/v6.9.2/node-v6.9.2-linux-x64.tar.gz
tar –xzvf node-v6.9.2-linux-x64.tar.gz
Install WebStorm
Please note that WebStorm is a commercial tool, but it can be used for 30 days for free.
-
Go to https://www.jetbrains.com/webstorm/ and click the Download button. A
tar.gzfile will then be downloaded (when writing these instructions the file was calledWebStorm-2016.3.2.tar.gz). -
Unpack the file. This will create a new directory (for these instructions the directory was called
WebStorm-163.9166.30) -
The directory contains a file called
Install-Linux-tar.txtthat describes how to install/start WebStorm. Basically what you need to do is run thewebstorm.shscript../webstorm.sh -
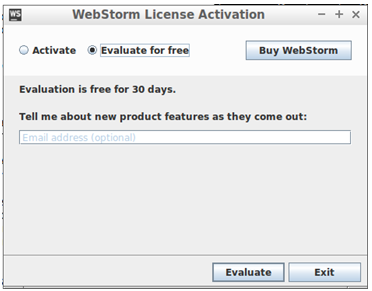
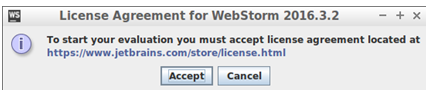
When WebStorm is started you will be asked to activate the license. In this case we are evaluating WebStorm and choose Evaluate for free as shown in the figure below. You must also accept the license agreement.
-
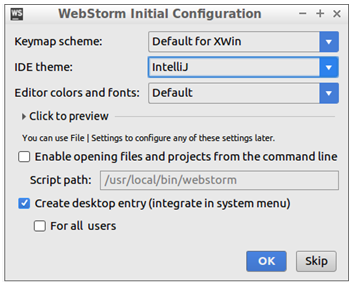
You will then be asked for the initial configuration. We used the default settings as shown in the figure below.
-
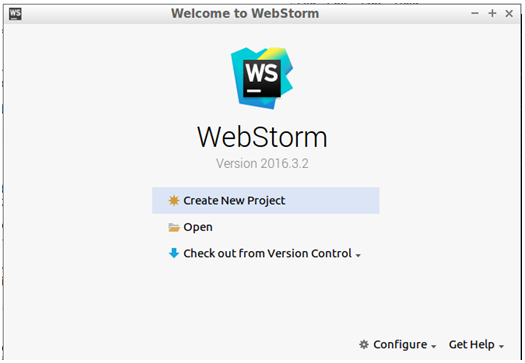
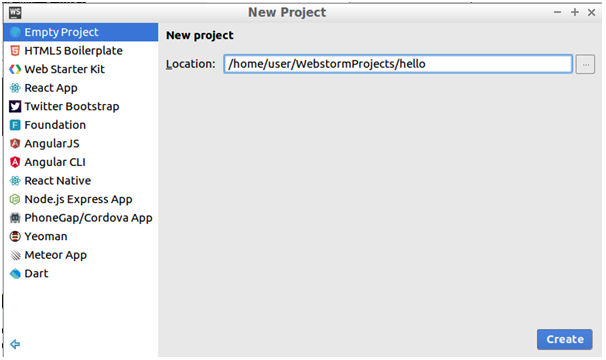
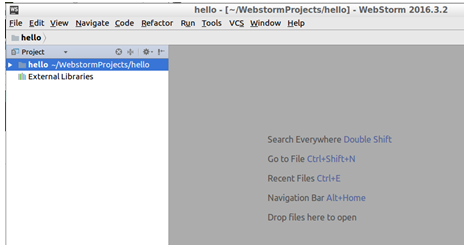
Click on Create New Project to create a new project. Select the type Empty Project and specify a location. These steps are shown in the three figures below.
-
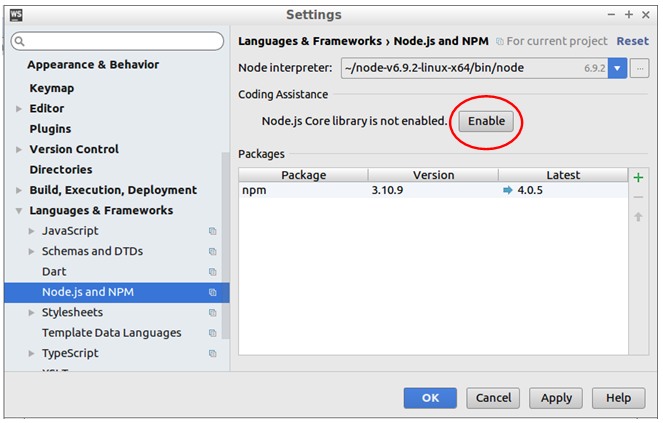
We need to specify which version of Node.js to use when running the application locally. Go to File → Settings in the menu and then select Languages & Frameworks → Node.js and NPM. In the Node interpreter field specify the path to Node.js we installed above. The figure below shows how the Settings dialog can look like when the interpreter has been chosen. Before closing the window click the Enable button in the Code Assistance field.
-
Click the OK button to close the Settings dialog.
-
It is now time to create the application file. Go to File → New and click JavaScript File in the menu. Enter a name of the file. In this example we call it
hello.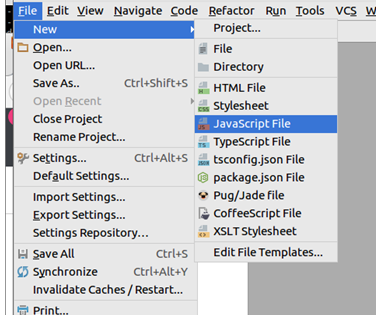
-
The file will only contain a header when created. Add the line shown in the figure below. This is the same application as show in the Hello World section above.
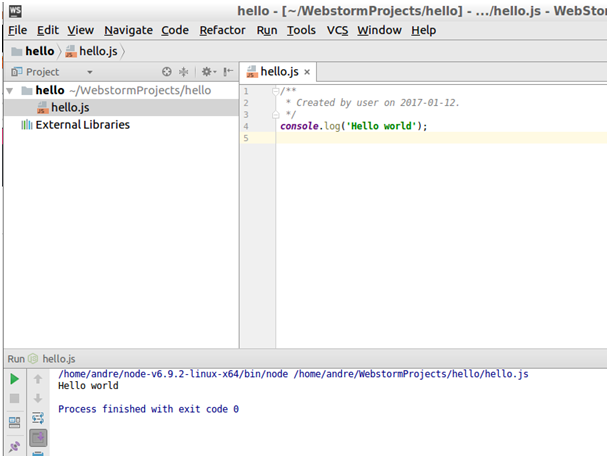
- Right-click on
hello.jsin the Project view and select Run hello.js to start the application. The output will be shown in the console window as illustrated in the bottom of the figure above.
ECMAScript 6
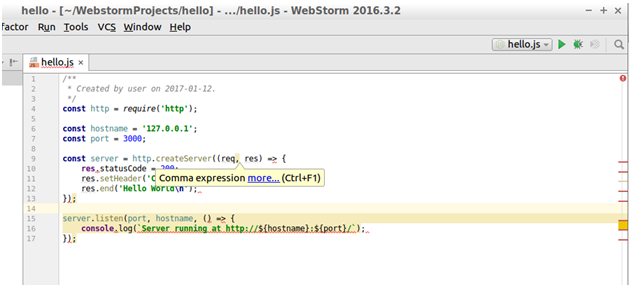
If you try to run the application described in the Simple web server section you will get some errors as shown in the figure below. The reason is that the code contains JavaScript constructs that was introduced in the JavaScript version called ECMAScript 6. By default WebStorm is using ECMAScript 5.1.
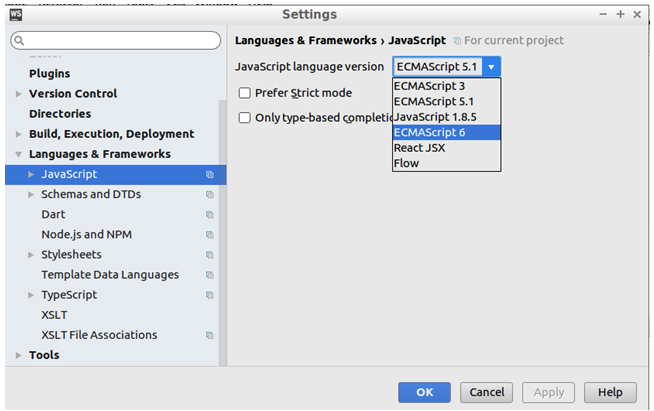
To change the version, go to File → Settings in the menu. Then select Languages & Frameworks → JavaScript and change the version to ECMAScript 6 as shown in the figure below.
Local debugging
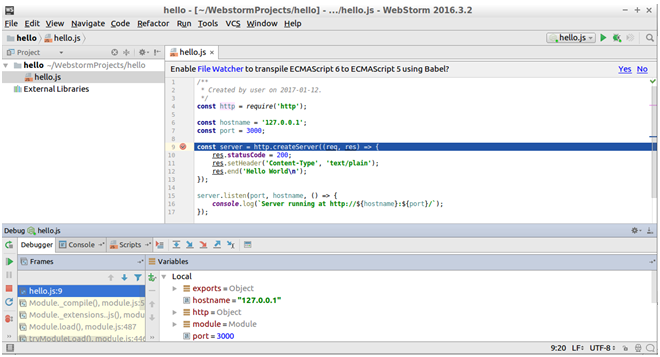
Debugging on the development computer is quite simple. All you need to do is set a breakpoint in the code by clicking on the row. Then right-click on hello.js in the project view and select Debug hello.js. The figure below shows a debug session where the debugger has stopped on a breakpoint.
Remote deployment
It is possible to deploy the application from within WebStorm, that is, upload it to the target.
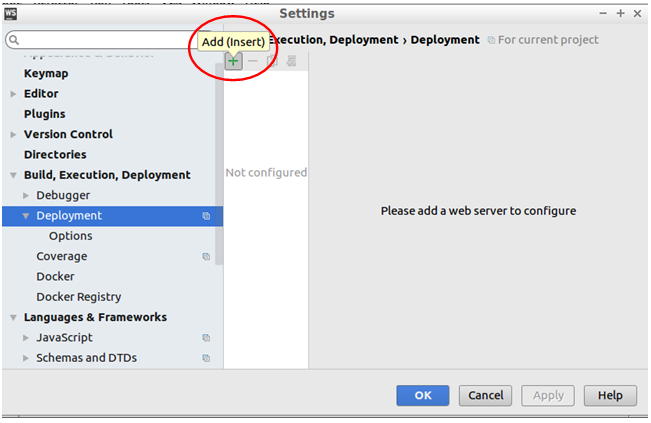
Go to File → Settings and then Build, Execution, Deployment → Deployment and click on the plus icon as shown in the figure below.
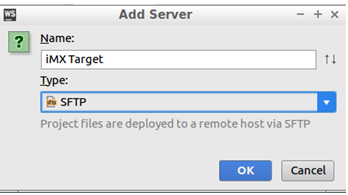
Give the connection a name and then choose SFTP as server type as shown in the figure below. Click OK.
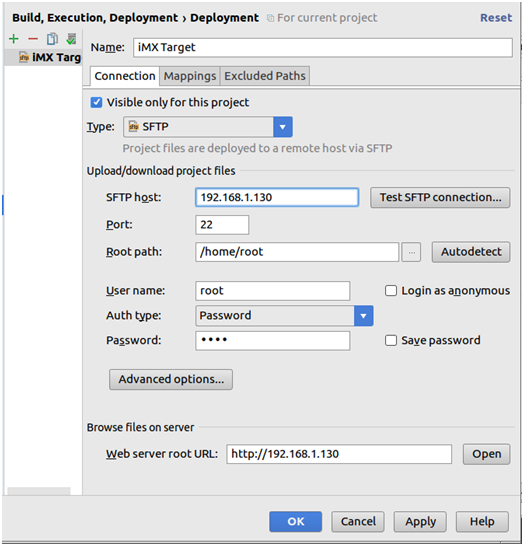
In the Connection settings window specify the IP address of the target in the SFTP host field. Set the user name (root) and password (pass). When this has been done click on the Test SFTP connection button to verify that the connection is working. If it is working you can click in the browse button (three dots) by the Root path field and choose where to upload the files. In this case we have chosen the home directory of the user root. All of this is shown in the figure below.
Go to the Mappings tab and select the Deployment path as shown in the figure below.

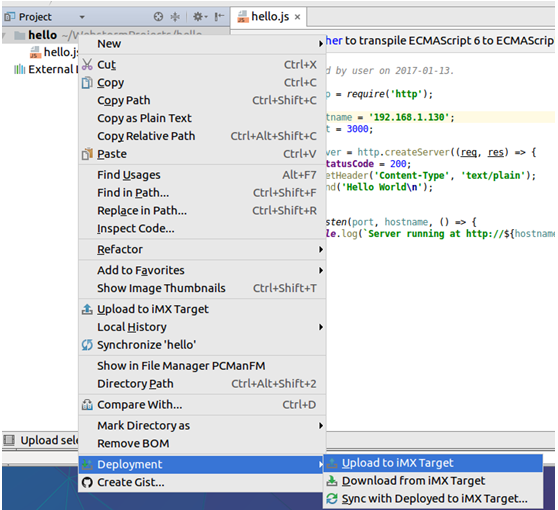
To deploy the application right-click on the project and then go to Deployment → Upload to iMX Target as shown in the figure below.
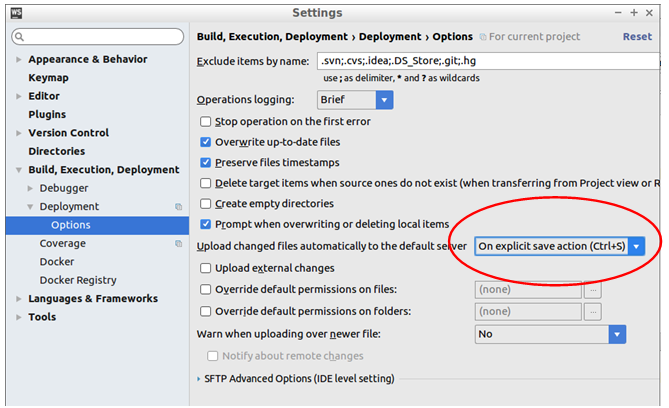
It is also possible to automatically deploy the application, for example, each time you save the project. Go to File → Settings and then Build, Execution, Deployment → Deployment → Options. As shown in the figure below you can select to automatically upload the files.
Run application on target
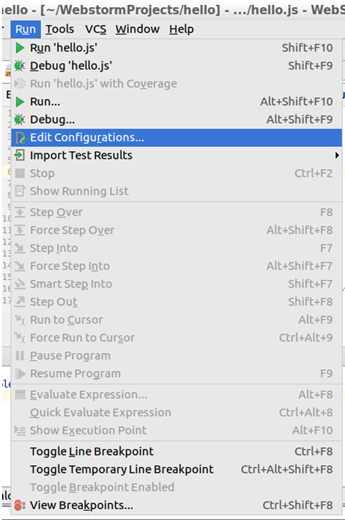
Besides deploying an application to the target it is also possible to start the application on the target from within WebStorm. Go to Run → Edit Configurations in the menu as shown in the figure below.
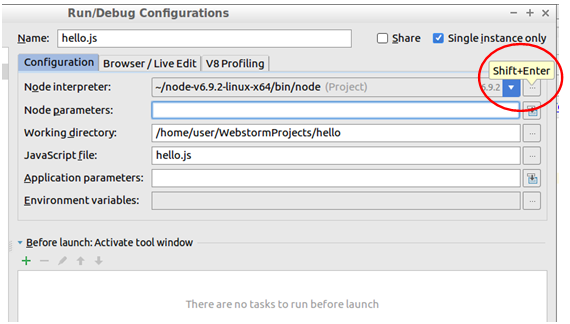
Click on the Browse button beside the Node interpreter field as shown in the figure below.
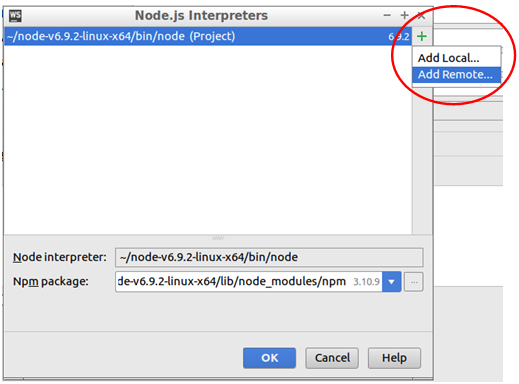
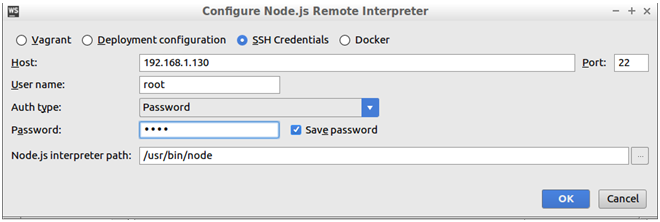
Click on the plus icon and select Add Remote as shown in the figure below.
Specify the IP address as well as username (root) and password (pass). Finish by clicking on OK.
You can now run the application on target by right-clicking on the target and select "Run hello.js". Please note that you must have deployed the application before you can run it.