GUI Demos from Crank Software
Introduction
This guide provides you with step-by-step instructions for how to program and run graphical demos from Crank Software on Embedded Artists iMX6, iMX7 and iMX8 based COM boards.
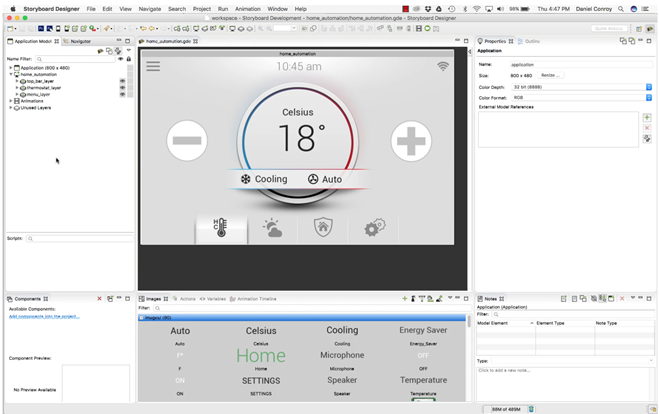
Crank Software, an AMETEK company, develops the product Storyboard that will help you design and develop a User Interface for your embedded system. The demos show different kind of user interfaces developed with Storyboard.
Demos are available for:
- iMX8M Mini uCOM
- iMX8M Nano uCOM
- iMX8M Quad COM
- iMX7 Dual COM
- iMX7 Dual uCOM
- iMX7ULP uCOM
- iMX6 Quad COM
- iMX6 SoloX COM
- iMX6 UltraLite COM
Crank Software
Crank Software, an AMETEK company, is both a software and service-based company with headquarters in Canada. They have extensive GUI design and development experience and provide the tool Storyboard. With this tool customers can easily develop User Interfaces for their products.
Crank Software has customers worldwide and there are several 100 million devices in the field running user interfaces developed with Storyboard.

Storyboard
Storyboard is the software developed by Crank Software that will make it easier for you to develop a user interface for your product. It consists of two parts; Storyboard Designer which you use to develop your user interface and Storyboard Engine that runs your application. Storyboard Engine is available for many different platforms.
Some of the features of Storyboard:
- Decouples front-end UI from back-end logic
- Data model and events API connects them together
- Hardware agnostic framework – working across many platforms
- Enables collaborative workflow for designers and developers
Resources
Here are some further resources related to Crank Software and Storyboard.
Quickstart Video Tutorials
https://www.cranksoftware.com/resources/quickstart-video-tutorials
Knowledge Base
https://support.cranksoftware.com/hc/en-us/categories/360005511011-Knowledge-base
Community Forum
https://support.cranksoftware.com/hc/en-us/community/topics
Professional Services
https://www.cranksoftware.com/professional-services
Setup hardware
7-inch HDMI display kit
All the instructions in this guide are based on using the 7-inch HDMI display kit (EAD00363 or EAD00369) from Embedded Artists.
Follow the instructions in the 7-inch HDMI display kit guide to setup the hardware.
Run the demo
This section contains one subsection with instructions for each supported COM board. Go to the subsection for the COM board you are using.
iMX8M Mini uCOM
Information about the demo
Below are a few highlighted features about the demo.
- Resolution: 1280x720
- Rendering: OpenGL ES 2.0
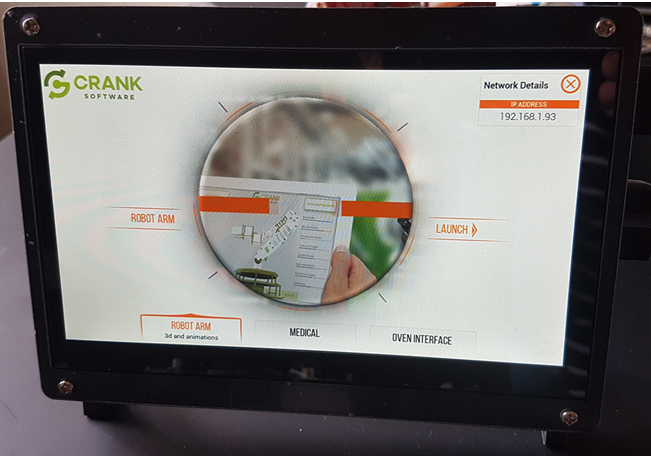
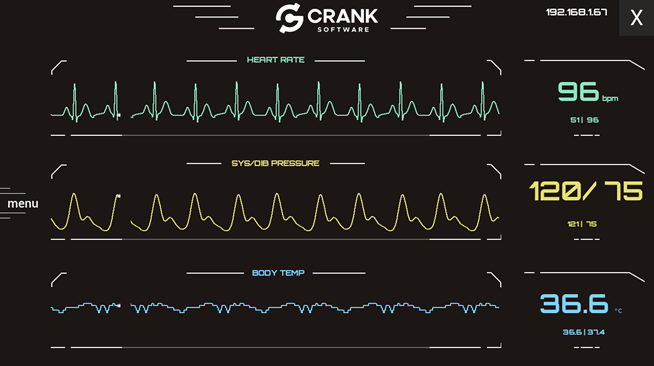
- Demos: Oven (Appliances), 3D Robotic Arm (Industrial), Vitals Monitor (Medical)
- Storyboard version: 6.0.0
Instructions
For this board there is a MIPI-to-HDMI bridge on the uCOM adapter so you can connect the HDMI cable between the HDMI connector (J13) on the carrier board and the HDMI connector on the display.
- First deploy the image containing the demo to the board. See the Yocto guide for instruction. The uuu bundle containing the demo can be found on https://sw.embeddedartists.com.
- Set jumper J2 in open state and reset the board.
- Let the board boot into Linux.
- Login using user:
rootand password:pass. - The demo will now be unpacked and then the board will automatically reboot.
- When the board has rebooted you should see the demo on the display.
iMX8M Nano uCOM
Information about the demo
This is the same demo as for iMX8M Mini uCOM. Below are a few highlighted features about the demo.
- Resolution: 1280x720
- Rendering: OpenGL ES 2.0
- Demos: Oven (Appliances), 3D Robotic Arm (Industrial), Vitals Monitor (Medical)
- Storyboard version: 6.0.0
Instructions
For this board there is a MIPI-to-HDMI bridge on the uCOM adapter so you can connect the HDMI cable between the HDMI connector (J13) on the carrier board and the HDMI connector on the display.
- First deploy the image containing the demo to the board. See the Yocto guide for instruction. The uuu bundle containing the demo can be found on https://sw.embeddedartists.com.
- Set jumper J2 in open state and reset the board.
- Let the board boot into Linux.
- Login using user:
rootand password:pass. - The demo will now be unpacked and then the board will automatically reboot.
- When the board has rebooted you should see the demo on the display.
iMX8M COM
Information about the demo
Below are a few highlighted features about the demo.
- Resolution: 1280x720
- Rendering: OpenGL ES 2.0
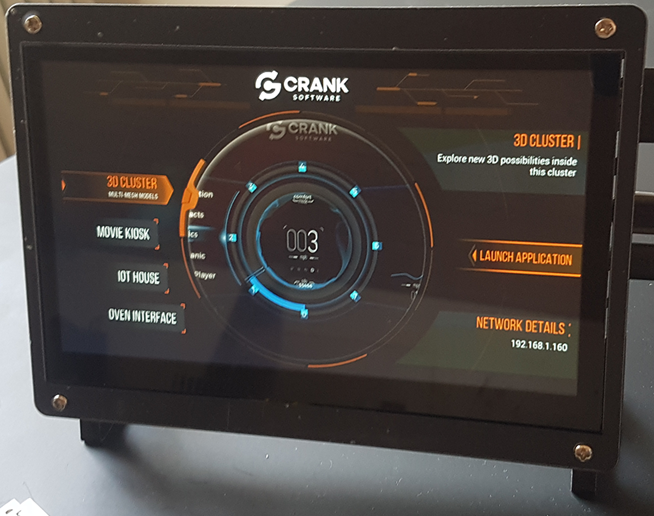
- Demos: Smart Home (IoT), Movie Kiosk (Consumer) , 3D cluster (Automotive), Oven (Appliances)
- Storyboard version: 6.0.0
Instructions
This board has direct support for HDMI display interfaces. Connect the HDMI cable between the HDMI connector (J13) on the carrier board and the HDMI connector on the display.
- First deploy the image containing the demo to the board. See the Yocto guide for instructions. The uuu bundle containing the demo can be found on https://sw.embeddedartists.com.
- Set jumper J2 in open state and reset the board.
- Let the board boot into Linux.
- Login using user: root and password: pass.
- The demo will now be unpacked and then the board will automatically reboot.
- When the board has rebooted you should see the demo on the display.
iMX7 Dual COM / iMX7 Dual uCOM
Information about the demo
Below are a few highlighted features about the demo.
- Resolution: 800x480 (the display resolution is 800x600)
- Rendering: Framebuffer (fbdev)
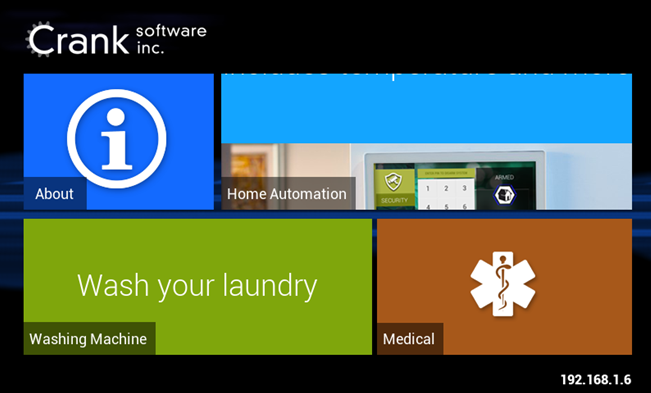
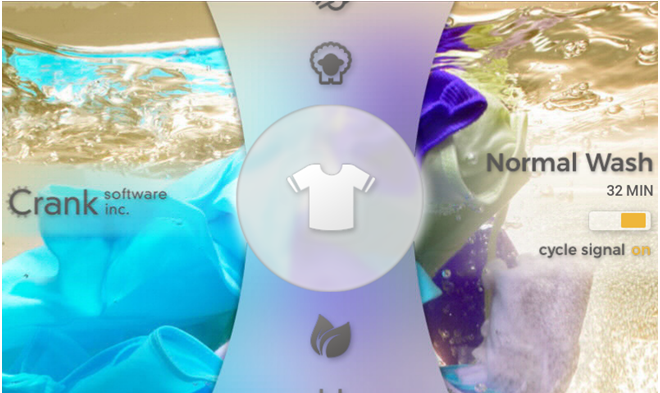
- Demos: Washing Machine (White goods), Home Automation, Medical
- Storyboard version: 5.0.0
Instructions
This board supports RGB display interface which means that you must use the RGB-to-HDMI adapter.
- First deploy the image containing the demo to the board. See the Yocto guide for instructions. The uuu bundle containing the demo can be found on https://sw.embeddedartists.com.
- Set jumper J2 in open state (see Figure 13) and reset the board.
- Boot into U-Boot and enter the commands below.
- Enable the sii902x device (RGB-to-HDMI bridge).
setenv cmd_custom fdt set i2c0/sii902x status okay\;fdt set /sii902x-reset status okay- Enable the RGB display interface.
eadisp enable rgb- Add a new display configuration.
Check which number the new configuration got (in this case it was 8).eadisp add rgb "DMTFT70:24:33336667,1280,720,89,164,75,75,10,10,0,0,1,0"eadispAvailable display configurations:
0) rgb Innolux-AT070TN:24:33336667,800,480,89,164,75,75,10,10,0,0,1,0
1) rgb nhd-4.3-480272ef:24:9009009,480,272,2,2,2,2,41,10,0,0,1,0
2) rgb nhd-5.0-800480tf:24:29232073,800,480,40,40,29,13,48,3,0,0,1,0
3) rgb nhd-7.0-800480ef:24:29232073,800,480,40,40,29,13,48,3,0,0,1,0
4) rgb umsh-8864:24:9061007,480,272,20,20,20,20,3,3,0,0,1,0
5) rgb umsh-8596-30t:24:33264586,800,480,128,120,20,20,8,5,0,0,1,1
6) rgb umsh-8596-33t:24:32917475,800,480,200,200,45,45,1,1,0,0,1,1
7) rgb rogin-rx050a:24:32917475,800,480,200,200,45,45,1,1,0,0,1,0
8) rgb DMTFT70:24:33336667,1280,720,89,164,75,75,10,10,0,0,1,0- Change to the new display configuration.
eadisp conf rgb 8- Save the changes.
saveenv- Boot into Linux.
boot - Let the board boot into Linux.
- Login using user:
rootand password:pass. - The demo will now be unpacked and then the board will automatically reboot.
- When the board has rebooted you should see the demo on the display.
iMX7ULP uCOM
Information about the demo
Below are a few highlighted features about the demo.
- Resolution: 640x480
- Rendering: Framebuffer (fbdev)
- Demos: Home Automation
- Storyboard version: 5.0.0
Instructions
For this board there is a MIPI-to-HDMI bridge on the uCOM adapter so you can connect the HDMI cable between the HDMI connector (J13) on the carrier board and the HDMI connector on the display.
- First deploy the image containing the demo to the board. See the Yocto guide for instructions. The uuu bundle containing the demo can be found on https://sw.embeddedartists.com.
- Set jumper J2 in open state and reset the board.
- Let the board boot into Linux.
- Login using user:
rootand password:pass. - The demo will now be unpacked and then the board will automatically reboot.
- When the board has rebooted you should see the demo on the display.
iMX6 Quad COM
Information about the demo
Below are a few highlighted features about the demo.
- Resolution: 1280x720
- Rendering: OpenGL ES 2.0
- Demos: Smart home (IoT), Movie Kiosk (Consumer), Vitals Monitor (Medical)
- Storyboard version: 5.0.0
Instructions
This board has direct support for HDMI display interfaces. Connect the HDMI cable between the HDMI connector (J13) on the carrier board and the HDMI connector on the display.
- First deploy the image containing the demo to the board. See the Yocto guide for instructions. The uuu bundle containing the demo can be found on https://sw.embeddedartists.com.
- Set jumper J2 in open state and reset the board.
- Boot into U-Boot and enter the commands below.
- Enable the HDMI interface
eadisp enable hdmi- Change to 32 bits per pixel (bpp). The demo won’t start with 24.
setenv cmd_custom fdt set fb_hdmi default_bpp <0x20>- Save changes and boot into Linux
saveenv
boot - Let the board boot into Linux.
- Login using user:
rootand password:pass. - The demo will now be unpacked and then the board will automatically reboot.
- When the board has rebooted you should see the demo on the display.
iMX6 SoloX COM
Information about the demo
Below are a few highlighted features about the demo.
- Resolution: 800x480 (the display resolution is 800x600)
- Rendering: OpenGL ES 2.0
- Demos: Washing Machine
- Storyboard version: 5.3.0
Instructions
This board supports RGB display interface which means that you must use the RGB-to-HDMI adapter.
- First deploy the image containing the demo to the board. See the Yocto guide for instructions. The uuu bundle containing the demo can be found on https://sw.embeddedartists.com.
- Set jumper J2 in open state and reset the board.
- Boot into U-Boot and enter the commands below.
- Enable the sii902x device (RGB-to-HDMI bridge).
setenv cmd_custom fdt set i2c0/sii902x status okay\;fdt set /sii902x-reset status okay- Enable the RGB display interface.
eadisp enable rgb- Add a new display configuration.
eadisp add rgb "DMTFT70:24:33336667,1280,720,89,164,75,75,10,10,0,0,1,0"- Check which number the new configuration got (in this case it was 12).
eadispAvailable display configurations:
0) lvds0 hannstar:18:64998375,1024,768,220,40,21,7,60,10,0,0,0,0
1) lvds0 lp101wh4_X11:24:72051300,1360,768,80,48,14,3,32,5,0,0,1,0
2) lvds0 lp101wh4:24:72332730,1366,768,80,48,14,3,32,5,0,0,1,0
3) lvds0 nhd-10.1-1024600af:24:51208521,1024,600,160,160,23,12,0,0,0,0,1,0
4) rgb Innolux-AT070TN:24:33336667,800,480,89,164,75,75,10,10,0,0,1,0
5) rgb nhd-4.3-480272ef:24:9009009,480,272,2,2,2,2,41,10,0,0,1,0
6) rgb nhd-5.0-800480tf:24:29232073,800,480,40,40,29,13,48,3,0,0,1,0
7) rgb nhd-7.0-800480ef:24:29232073,800,480,40,40,29,13,48,3,0,0,1,0
8) rgb umsh-8864:24:9061007,480,272,20,20,20,20,3,3,0,0,1,0
9) rgb umsh-8596-30t:24:33264586,800,480,128,120,20,20,8,5,0,0,1,1
10) rgb umsh-8596-33t:24:32917475,800,480,200,200,45,45,1,1,0,0,1,1
11) rgb rogin-rx050a:24:32917475,800,480,200,200,45,45,1,1,0,0,1,0
12) rgb DMTFT70:24:33336667,1280,720,89,164,75,75,10,10,0,0,1,0- Change to the new display configuration.
eadisp conf rgb 12- Save the changes.
saveenv- Boot into Linux.
boot - Let the board boot into Linux.
- Login using user:
rootand password:pass. - The demo will now be unpacked and then the board will automatically reboot.
- When the board has rebooted you should see the demo on the display.
iMX6 UltraLite COM
Information about the demo
Below are a few highlighted features about the demo.
- Resolution: 800x480 (the display resolution is 800x600)
- Rendering: Framebuffer (fbdev)
- Demos: Washing Machine (Appliances), Coffee Machine (Consumer), Home Automation (IoT)
- Storyboard version: 5.3.0

Instructions
This board supports RGB display interface which means that you must use the RGB-to-HDMI adapter.
- First deploy the image containing the demo to the board. See the Yocto guide for instructions. The uuu bundle containing the demo can be found on https://sw.embeddedartists.com.
- Set jumper J2 in open state and reset the board.
- Boot into U-Boot and enter the commands below.
- Enable the sii902x device (RGB-to-HDMI bridge).
setenv cmd_custom fdt set i2c0/sii902x status okay\;fdt set /sii902x-reset status okay- Enable the RGB display interface.
eadisp enable rgb- Add a new display configuration.
eadisp add rgb "DMTFT70:24:33336667,1280,720,89,164,75,75,10,10,0,0,1,0"- Check which number the new configuration got (in this case it was 8).
eadispAvailable display configurations:
0) rgb Innolux-AT070TN:24:33336667,800,480,89,164,75,75,10,10,0,0,1,0
1) rgb nhd-4.3-480272ef:24:9009009,480,272,2,2,2,2,41,10,0,0,1,0
2) rgb nhd-5.0-800480tf:24:29232073,800,480,40,40,29,13,48,3,0,0,1,0
3) rgb nhd-7.0-800480ef:24:29232073,800,480,40,40,29,13,48,3,0,0,1,0
4) rgb umsh-8864:24:9061007,480,272,20,20,20,20,3,3,0,0,1,0
5) rgb umsh-8596-30t:24:33264586,800,480,128,120,20,20,8,5,0,0,1,1
6) rgb umsh-8596-33t:24:32917475,800,480,200,200,45,45,1,1,0,0,1,1
7) rgb rogin-rx050a:24:32917475,800,480,200,200,45,45,1,1,0,0,1,0
8) rgb DMTFT70:24:33336667,1280,720,89,164,75,75,10,10,0,0,1,0- Change to the new display configuration.
eadisp conf rgb 8- Save the changes.
saveenv- Boot into Linux.
boot - Let the board boot into Linux.
- Login using user:
rootand password:pass. - The demo will now be unpacked and then the board will automatically reboot.
- When the board has rebooted you should see the demo on the display.